For many women around the world, their makeup bag is an essential toolkit. It commonly includes a plethora of cosmetic products, makeup brushes, and applicators that cater to her every possible aesthetic need, with tools that allow even the most inexperienced makeup user to apply their face makeup with confidence and precision.
Whilst no makeup routine is the same, there are some items that are considered crucial to any makeup bag. One such item is the much-loved beauty or cosmetic sponge, more commonly known by the product name of the top-rated beauty sponge, Beautyblender®.
There is a reason the beauty blender has become a staple in many makeup bags. This versatile tool can be used for various makeup applications, from liquid foundation, setting powder, and concealer to blush.
While it can be a bit intimidating if you’re new to using a beauty blender sponge, this article will cover the basics of how to use a Beautyblender (or any other cosmetic sponge, for that matter) to achieve a flawless complexion and overall makeup look.
What Is a BeautyBlender®?
A BeautyBlender is a makeup sponge that was designed to apply and blend makeup products flawlessly onto the skin. Invented by LA-based makeup artist Rea Ann Silva in the early 2000s as an alternative to airbrushing actors on set, the BeautyBlender is a versatile tool that can be used to apply BB cream, foundation, concealer, cream blush, highlighter, and other makeup products.
“The Beautyblender’s unique design allows for impeccably blended makeup, essential for that sought-after flawless, airbrushed look. This is something I always emphasize with clients,” says Christy Calafati, a beauty expert and makeup artist. “The precision they offer, thanks to their pointed tip and rounded base, makes them indispensable for both professional artists and beauty enthusiasts.”
Suitable for all skin types, vegan and cruelty-free, the Beautyblender is made of an exclusive aqua-activated™ material that is soft, bouncy, and easy to use. It absorbs minimal product to ensure that whatever product is applied lands on your skin, not the sponge.
True to the reason it was invented, the BeautyBlender allows users to create a flawless, airbrushed finish on the skin easily. It is designed to blend makeup products seamlessly without leaving any streaks or lines. The Beautyblender is also perfect for achieving a natural, dewy look that is popular among makeup enthusiasts.
It’s important to note that many different types of cosmetic sponges are available on the market, from different shapes and colors to different materials. Whilst these are essentially Beautyblender dupes, the basic technique for using a beauty blender remains the same. The key is to use a damp beauty blender, which will help blend your makeup seamlessly into your skin. Run your beauty blender under water and squeeze out any excess liquid to dampen it.
Types of Beauty Blenders
There are several types of Beautyblenders available on the market:
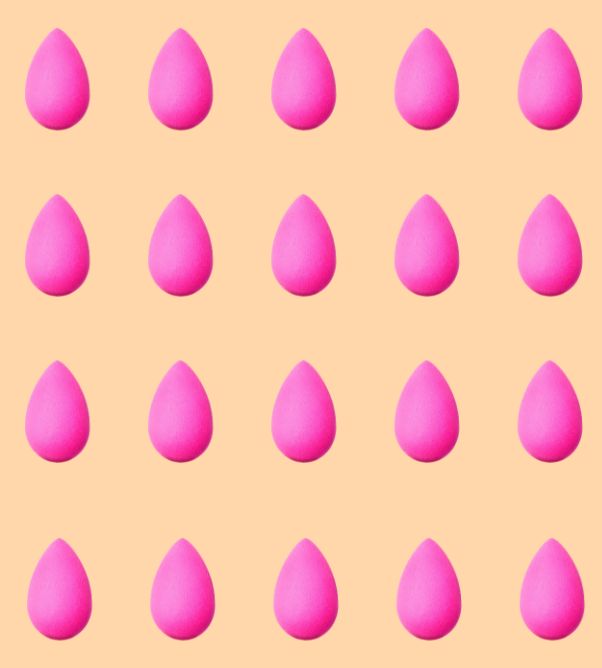
- THE ORIGINAL BEAUTYBLENDER® Makeup Sponge: The original beauty blender and premier edgeless cosmetic sponge, made with exclusive aqua-activated™ material. Shaped like a teardrop and available in classic pink, this sponge is designed to be used wet. When wet, the beauty blender expands in size and becomes softer, making it easier to use on the skin. This item is worth all the product buzz and is a 15x Winner in the Allure Best of Beauty Hall of Fame. It is also available in a number of limited-edition hues.
- BEAUTYBLENDER® PRO Makeup Sponge: a black version of the original beauty blender, designed for use with darker makeup products.
- BEAUTYBLENDER® SHADESHIFTER Makeup Sponge: An alternative tear-shaped beauty blender made with heat-activated technology, allowing the blender to change color after being dampened with hot water.
- BEAUTYBLENDER® NEUTRALS Makeup Sponge: Crafted from the same aqua-activated™ material found in the Beautyblender ORIGINAL makeup sponge, this exclusive limited-edition Beautyblender makeup sponge is available in a complementary shade to match your foundation tones.
Preparing Your BeautyBlender (Or Any Makeup Sponge)
Using a beauty blender is not as simple as removing it from its packaging and immediately using it to apply makeup products. There are some very basic steps that should be followed to ensure that you get the best results. Here’s what you need to know:
Wash Before First Use
Before using your beauty blender for the first time, it is important to wash it thoroughly. This will remove any residual chemicals or debris from the manufacturing process. To wash your beauty blender, follow these simple steps:
- Wet the sponge with warm water.
- Apply a small amount of gentle cleanser to the sponge.
- Gently massage the cleanser into the sponge, working it into a lather.
- Rinse the sponge thoroughly with warm water until all the cleanser is removed.
- Squeeze out excess water and allow the sponge to air dry.
Dampen the Sponge Before Use
To use your beauty blender effectively, it is important to dampen it first. Dampening will help the sponge to absorb less product and distribute it more evenly on your skin. To dampen your beauty blender, follow these steps:
- Hold the sponge under running water until it is completely saturated.
- Squeeze out excess water until the sponge is damp but not dripping.
- Use a towel to pat the sponge and remove any excess water gently.
Applying Makeup with a Beauty Blender
Ashley Nichole Gibson, owner and lead makeup artist at Paraposh, says “Beautyblenders enhance makeup application by providing an even, airbrushed finish, allowing for precise application and blending, and offering versatility with various product types. Their use can make a noticeable difference in the overall look and feel of the makeup applied.”
Here are some of the things you can do with the Beautyblender:
Apply Foundation
After dampening the blender, apply a small amount of foundation to the back of your hand or directly onto the blender. Using a bouncing or stippling motion, apply the foundation to your face, starting from the center and working your way outwards.
The beauty blender creates an even, airbrushed finish by blending the foundation seamlessly into your skin. Be sure to use the pointed end of the blender to get into hard-to-reach areas, such as around the nose and eyes. It really is as simple as that.
Gibson explains, “This efficiency is a big plus for those who use expensive foundation or concealer. The sponge’s soft texture helps to blend the product seamlessly into the skin, reducing the appearance of pores and fine lines.”
Apply Concealer
To apply concealer with a beauty blender, apply a small amount of concealer directly onto the area you want to cover. Use the round end of the blender to dab the concealer until it is blended in well with the foundation. You may also want to use both the large side and pointed end of the blender when applying concealer under the eyes to cover dark circles.
Setting Powder
After applying primer, foundation, and concealer, you might want to lock in your base layer with a light dusting of translucent powder. It is important to apply setting powder before your foundation and concealer have dried completely.
Whilst it may sound counterintuitive, you can apply setting powder to your face using a Beautyblender. Load the pointed end of the Beautyblender with powder and dab onto the areas under the eyes. Continue on to the apples of your cheeks to set your makeup and create a natural, matte finish.
A member of an online forum loves to apply her setting powder this way, saying, “I use a damp BB and pressed powder to set concealer – the benefit is that you’re not ‘baking’ just setting, you press the powder into the skin to create a nice silky finish with no excess (using less product).”
Contour
To contour, select any contour product two shades darker than your base. Run the contour product along your hairline down to your temples. Next, suck in your cheeks and follow the line from your ear to the corner of your mouth. Start to blend your contouring into your foundation, using the large side of a damp Beautyblender. Be sure to blend the contour into your hairline so the shadow appears natural.
To see this technique in action, head to Tiktok and watch Meredith Duxbury as she works her ‘blend, blend, blend’ magic. Bounce in a slightly upward direction everywhere besides your jawline, where you’ll blend down into your neck.
Highlight
While contouring aims to chisel the face and define bone structure, a highlighter helps to illuminate it. Highlighters can be bought in various formats, including gels, sticks, powders, creams, or liquids. Very often they are normally available in a number of shades.
Highlighters should be applied to the high points of your face, including the tip of your nose, the top of your cheekbones, and in between your cupid bow. The pointed end of your beauty blender is the perfect tool for this.
Apply Blush
A makeup look is not complete without adding a touch of blush. Using a Beautyblender to apply blush makes the process a lot easier and allows much more control than when using a brush.
Dab your damp sponge into the pot of blush and bounce it on the apples of your cheeks, building up the color gradually.
Finish up your routine with a spritz of setting spray.
Cleaning and Maintenance
Follow these simple cleaning and maintenance tips to ensure your beauty blender stays clean, hygienic, and ready to use whenever needed!
Daily Cleaning Process
To ensure that your beauty blender is always clean and ready to use, it is important to clean it daily. The daily cleaning process is simple and can be completed in just a few minutes. Start by wetting the beauty blender with water, then apply a small amount of gentle soap or cleanser. Gently massage the blender to create a lather, then rinse it thoroughly with water. Squeeze out any excess water and let it air dry.
Deep Cleaning Methods
While daily cleaning is important, deep cleaning your beauty blender is also critical. You can use several methods for deep cleaning, including using a cleansing solution specifically designed for makeup sponges or creating your own solution using water and gentle soap. Another option is to use a microwave to sanitize your beauty blender. Wet the blender, place it in a microwave-safe bowl with water and a drop of soap, and microwave for one minute. Be sure to let it cool before removing it from the bowl.
Drying and Storage
After cleaning your beauty blender, it is important to dry and store it properly to prevent bacteria growth. Squeeze out any excess water and place it on a clean towel to air dry. Avoid placing it in a closed container or drawer while it is still damp. Once it is completely dry, store it in a clean and dry container or on a clean surface. Avoid storing it in a humid or damp environment.
Common Mistakes to Avoid
By avoiding these common mistakes, you can achieve a flawless and natural-looking makeup application with a beauty blender.
Using a Dry Sponge
One of the most common mistakes people make when using a Beautyblender is using it dry. A dry sponge can cause streaks and uneven application. There will also be wastage, as the sponge could absorb any liquid makeup products. Dampening the sponge before use is important to ensure a flawless finish and ensure that your product lands on your face and not in the sponge! Remember, the sponge should be damp but not dripping wet.
Over-Applying Product
Another mistake people make is over-applying the product to the sponge. This can lead to a cakey and unnatural look. To avoid this, start with a small amount of product and build up as needed. It is better to apply multiple thin layers than one thick layer.
Neglecting Hygiene
Neglecting to clean the beauty blender after each use can lead to bacteria and mold buildup. This can cause breakouts and skin irritation. To avoid this, wash the sponge with soap and water after each use and allow it to air dry. It is also important to replace the sponge every few months to ensure optimal performance and hygiene.
When to Replace Your Beauty Blender
It is important to know when to replace your beauty blender to ensure that you are getting the best results. Here are some signs that indicate it’s time to replace your beauty blender:
Wear and Tear
If your beauty blender is starting to show signs of wear and tear, it’s time to replace it. Over time, the sponge can become brittle, tear, or lose its shape. This can affect how it applies makeup, leading to streaky or patchy results.
Discoloration
If your beauty blender has started to change color, it’s time to replace it. Discoloration can occur due to makeup, oil, and bacteria buildup. Using a discolored beauty blender can lead to breakouts and skin irritation.
Foul Odor
If your beauty blender has a foul odor, this is another sign that it needs to be discarded. A bad smell can indicate the presence of bacteria, potentially leading to skin infections and breakouts.
Duration of Use
Even with proper cleaning, a beauty blender should be replaced every three months.
By keeping an eye out for these signs, you can ensure that your beauty blender is always in top condition, allowing you to apply makeup flawlessly and achieve the desired results.
Frequently Asked Questions About Beauty Blenders
If you’re pressed for time and can’t read the whole article, this is the section you need to read! We answer the most common Beautyblender questions here.
Do You Use a Beauty Blender Wet or Dry?
A Beautyblender should always be used damp! Wet your Beautyblender with water, squeeze out any excess liquid, and watch your Beautyblender expand! Beautyblender® themselves recommend a three-step process: wet, squeeze, bounce!
What Should You Use a Beauty Blender For?
A Beautyblender can be used for practically anything in your makeup bag, including foundations, BB cream, concealer, and even eyeshadow!
What Happens If You Don’t Wet Your Beauty Blender?
If you don’t wet your Beautyblender before use, the sponge could absorb the product which is meant to be on your face. You might also struggle to achieve that airbrush finish that the sponge was designed to provide.
Should You Wet Beauty Blender with Setting Spray?
You definitely can wet your Beautyblender with a setting spray, and some makeup artists even prefer it! It all boils down to personal preference. We suggest trying both methods to see which one works best for you.

Sarah is a syndicated freelance writer and editor of Dukes Avenue. She founded Dukes Avenue in 2018 as a creative outlet while working at a London hedge fund. What initially started as a small blog has become a widely read luxury lifestyle online publication targeted at the modern woman, with content curated to inspire readers to live their best and most fulfilled lives. Sarah has lived in London, Malta, and, most recently, the United Arab Emirates and uses her travels and experiences to inspire much of the content.
-
Sarah Borg Barthethttps://dukesavenue.com/author/sarah-borg-barthet/
-
Sarah Borg Barthethttps://dukesavenue.com/author/sarah-borg-barthet/
-
Sarah Borg Barthethttps://dukesavenue.com/author/sarah-borg-barthet/
-
Sarah Borg Barthethttps://dukesavenue.com/author/sarah-borg-barthet/
